Our QuickBooks Online integration allows you to seamlessly sync transaction details and create accounting records in QuickBooks. With this feature, you can categorize transactions and expenses directly from your Keep dashboard, simplifying your financial management.
Follow this guide to make the most out of your QuickBooks integration.
In This Article:
- Connecting to QuickBooks
- How to Upload Receipts
- Reviewing and Managing Transactions
- Syncing Transactions to QuickBooks
- Frequently Asked Questions
Who should read this:
- Account Admin
- Accountants
You can manage your accounting integrations directly from the Accounting section in your Keep dashboard.
Before You Begin
Ensure you have an existing QuickBooks account, or you can create one here
If you need to give one of your employees, like your accountant, access to your account, check out this guide: How to Give Access to Your Accountant.
Please note: The integration only syncs transaction information from Keep to QuickBooks. Any changes made in QuickBooks will not be reflected in Keep.
Connecting to QuickBooks
Follow these steps to successfully connect Keep to your QuickBooks account:
- Log In to your Keep dashboard.
- Navigate to the Accounting page from the left-hand menu.
- Click on the Start Now button in the Accounting page banner.
- Select Connect Accounting Provider and choose QuickBooks from the list.
- Log in to your QuickBooks account using your credentials to complete the connection.
Once connected, QuickBooks will display as "connected" on the Accounting section on the Settings page. You can also disconnect QuickBooks from this page at any time.
Note: Due to high demand, the connection may take up to 1 hour to complete.
How to Upload Receipts
Please refer to this Help Centre article on How to Upload Receipts
Reviewing and Managing Transactions
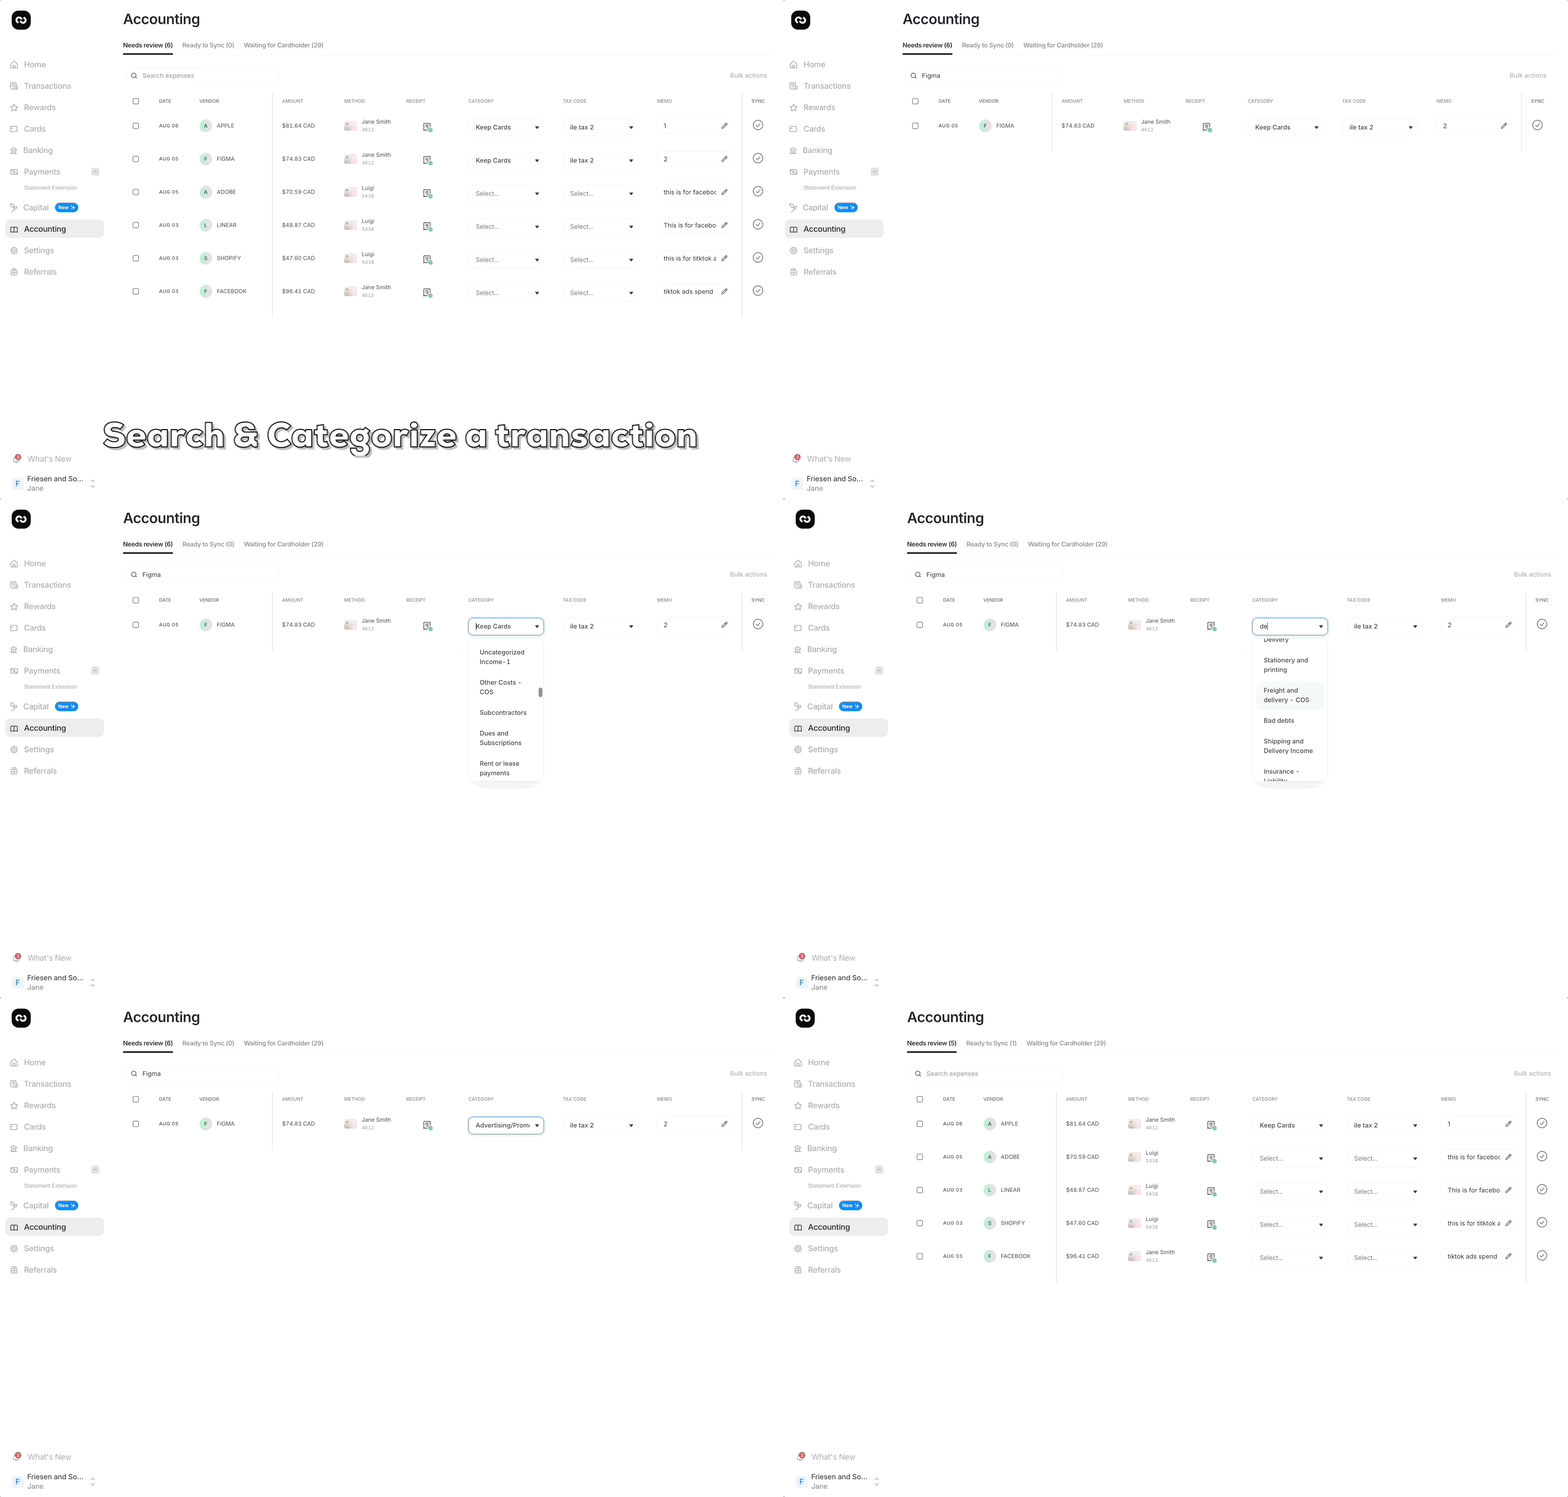
The Accounting page in Keep allows you to review and organize your transactions easily. There are four tabs on the Accounting Page.
- Needs Review
- Ready to Sync
- Waiting for Cardholder
- Synced
The ‘Needs Review’ section shows all transactions made by cardholders or employees that require review before syncing.
Take a look at the image above to see where everything is on your dashboard, and follow the numbers to guide you through.
What Each Transaction Shows:
(The numbers in the image above correspond to the sections below)
- Date: When the transaction happened.
- Description: A label about the transaction (e.g., “Chargeback”).
- Amount: The total value of the transaction (e.g., $7.00 CAD).
- Method: How the payment was made (e.g., credit card).
- Receipt: Shows if a receipt is attached. You can upload or view receipts here.
- QuickBooks Category: These categories are pulled directly from your QuickBooks account.
- QuickBooks Tax Code: These tax codes are pulled directly from your QuickBooks account.
- QuickBooks Vendor: These vendors are pulled directly from your QuickBooks account.
- QuickBooks Class: A field to assign transaction classes pulled directly from your QuickBooks account.
- Memo: Add a note or description about the transaction for future reference.
What You Can Do on This Page:
- Review Receipts: Check if a receipt is attached. If not, you can upload one.
- Categorize Transactions: Assign an expense category
- Assign Tax Codes: Pick the right tax code (e.g., GST or HST) for the transaction to ensure accurate reporting.
- Select a Vendor: Link each transaction to the correct vendor in QuickBooks for accurate tracking.
- Assign a Class: Specify the appropriate class for each transaction.
- Add Notes: Use the memo field to include additional details or context for each transaction.
Extra Tools to Make Your Job Easier:
- Filter and Search: Quickly find specific transactions by filtering them based on Date, Amount, or Category.
- Bulk Actions: Edit multiple transactions at once.

Organizing Transactions for Syncing
Once you’ve reviewed your transactions, select the ones that are ready to sync to QuickBooks and click Mark as Ready. These transactions will now move to the ‘Ready to Sync’ section.
Syncing Transactions to QuickBooks
The Ready to Sync section contains all transactions you’ve reviewed and marked as ready. You can choose to sync transactions individually or in bulk.
Important: After marking transactions as ready, click ‘Sync to QuickBooks’ at the top right to sync them with your QuickBooks account.
The Synced Section
This section shows all transactions that have been successfully synced with your QuickBooks account. You can use this section to verify that transactions are fully synchronized.

Frequently Asked Questions
- Is the QuickBooks integration free to use?
Yes, the QuickBooks integration is free for all Keep users. - Does this integration support QuickBooks Desktop?
No, the integration is only compatible with QuickBooks Online (Essentials tier or higher). - When do transactions sync to QuickBooks, and what kind of record is created?
Credit card transactions are synced from the Accounting page after being marked as ready and clicking Sync to QuickBooks. This creates a purchase record in QuickBooks
Need more help?
If you need further assistance with the integration or have additional questions, contact our support team support@trykeep.com or visit the Help Center.